


Setting up your institution
Before publishing content and receiving participants, it is worth spending a few minutes on the institution’s settings. That is what gives the platform your brand’s look and defines how people get in and move around it.
All the options below are under Institution, in the side menu of the administration console: when you open Institution, its settings screens appear right below it in the same side menu, grouped under General, People and access, Communication, Integrations and data and Engagement. This guide calls each of those screens a tab.
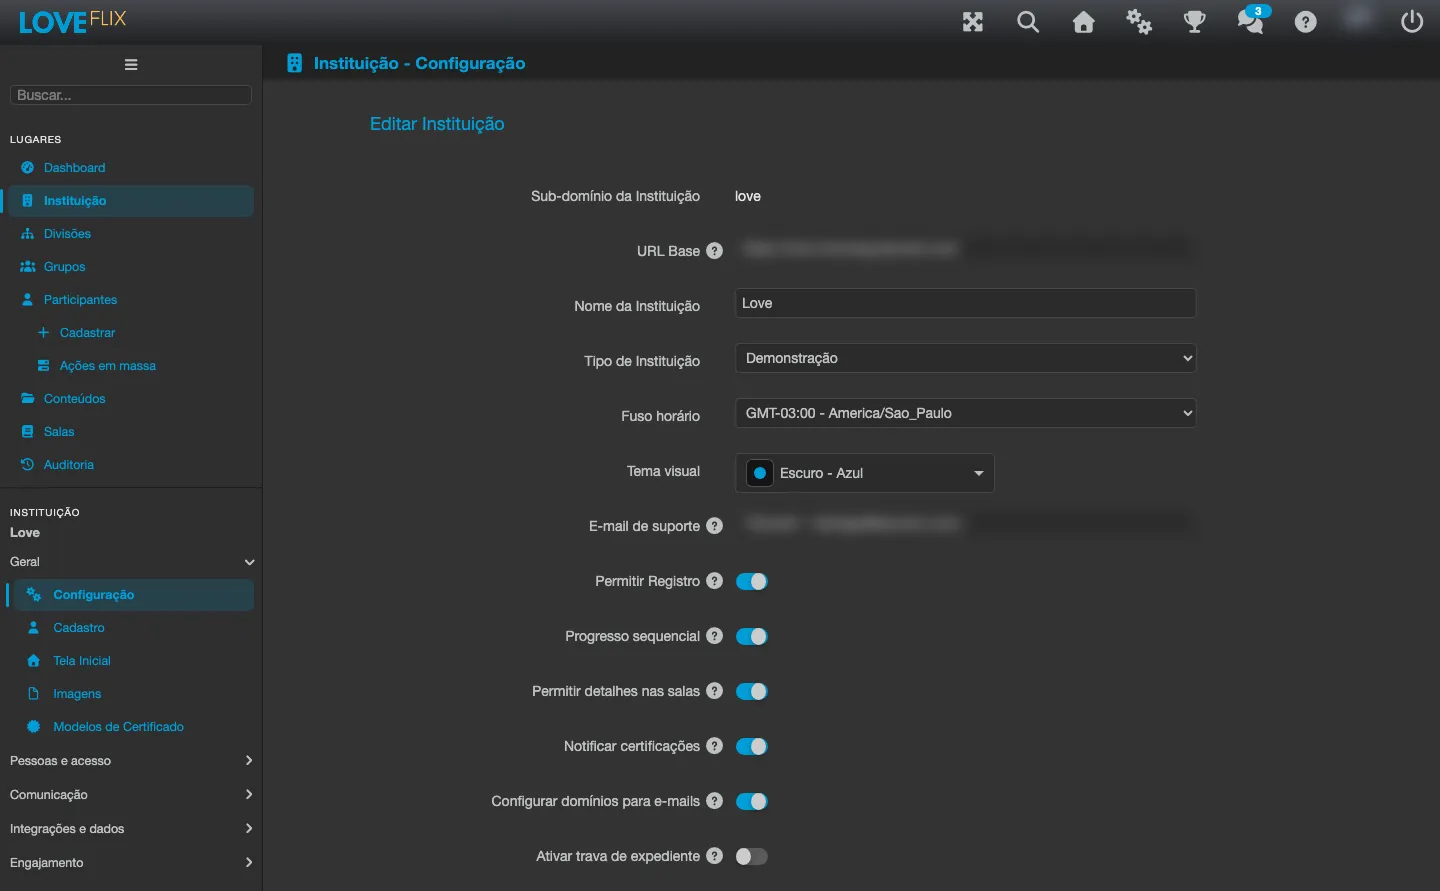
Configuration tab
Section titled “Configuration tab”The institution’s essentials: name, time zone, and visual theme (light and dark variations). When you switch the theme, the change stays in preview mode only for you until you click Save, when it takes effect for all participants.
The support email shown to participants also appears here, but it is not self-service: to configure it, contact support.
The Base URL is the institution’s canonical public address, and every link the platform generates comes from it: certificate verification, notification and enrollment emails, and the SSO sign-in address. It is visible to any administrator, but only the owner role can change it - and changing it does not make a new domain reachable on its own, since DNS and the hostname list need to serve it first. In an institution with SSO, register the new address at the identity provider before switching, because the change takes effect immediately.
This tab also holds the switches that turn on features for the whole institution, among them Allow password change, Allow password recovery by WhatsApp (see Access problems), and Allow playback speed (see Content types).
Images tab
Section titled “Images tab”Upload your institution’s logo and icons, used on the sign-in screen, at the top of the platform, and in the app.
Home Screen tab
Section titled “Home Screen tab”Define what the participant finds upon entering: the institution’s content storefront and the home page highlights. Organize the contents into categories to make navigation easier as the catalog grows.
Profile and E-mail tabs
Section titled “Profile and E-mail tabs”- On the Profile tab, configure the participants’ profile fields, which ones are mandatory, and whether participants can edit their own data (see Custom registration fields). How people get in - open registration, by the administrator, or through corporate sign-in - is defined in Access control.
- On the E-mail tab, restrict the authorized email domains that receive the platform’s messages, when it is for your organization’s internal use (see Authorized email domains).
Notifications
Section titled “Notifications”The Notifications tab sends a notice to all active participants (or to a specific group/division) - see Notifications to participants. The journey’s automatic emails (welcome, enrollments, class notices) are triggered by the platform itself, with no configuration on this screen.
Administrators tab
Section titled “Administrators tab”Grant the administrator role to those who will operate the platform with you. It is possible to give broad permissions (institution administrator) or permissions restricted to specific classes.
Next steps
Section titled “Next steps”- Create your first content.
- Open a class to receive participants.
- Register and enroll the participants.