


My team
If at least one person reports to you in your institution, the “My team” screen appears in the top menu. It shows your whole reporting line - direct and indirect reports - with each person’s progress in the content they are enrolled in. In the People and Dashboard tabs you can only view: the screen does not let you edit enrollments, grades or personal data.
People tab
Section titled “People tab”The People tab lists your whole team, with a search field for name, username, e-mail or CPF. Each row shows the person’s name, their division (when the institution uses divisions) and their direct manager - useful for seeing who an indirect report answers to directly.
Click a row to expand each person’s details:
- Their full profile: CPF, phone, address, birth date and the custom registration fields the institution uses, under the names set in its registration form.
- Their enrollments: the content, the class, the state, the progress, the grade and, when applicable, the certificate’s issue and expiry dates. When the person has many enrollments, they are shown 10 at a time, with numbered pages below.
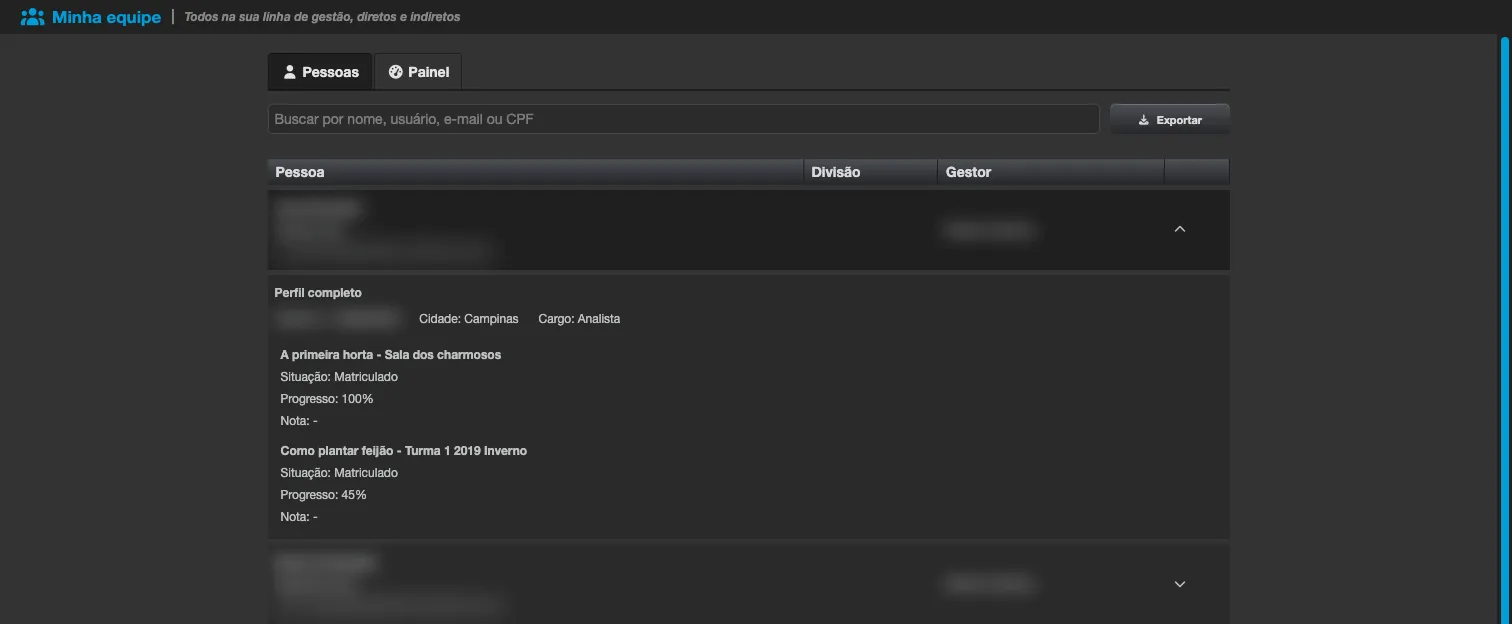
Use Export to download the whole team as a CSV, with the same profile and enrollment columns (one row per enrollment). Custom fields follow the institution’s registration form: only the ones it uses are included, under the names it set.
Dashboard tab
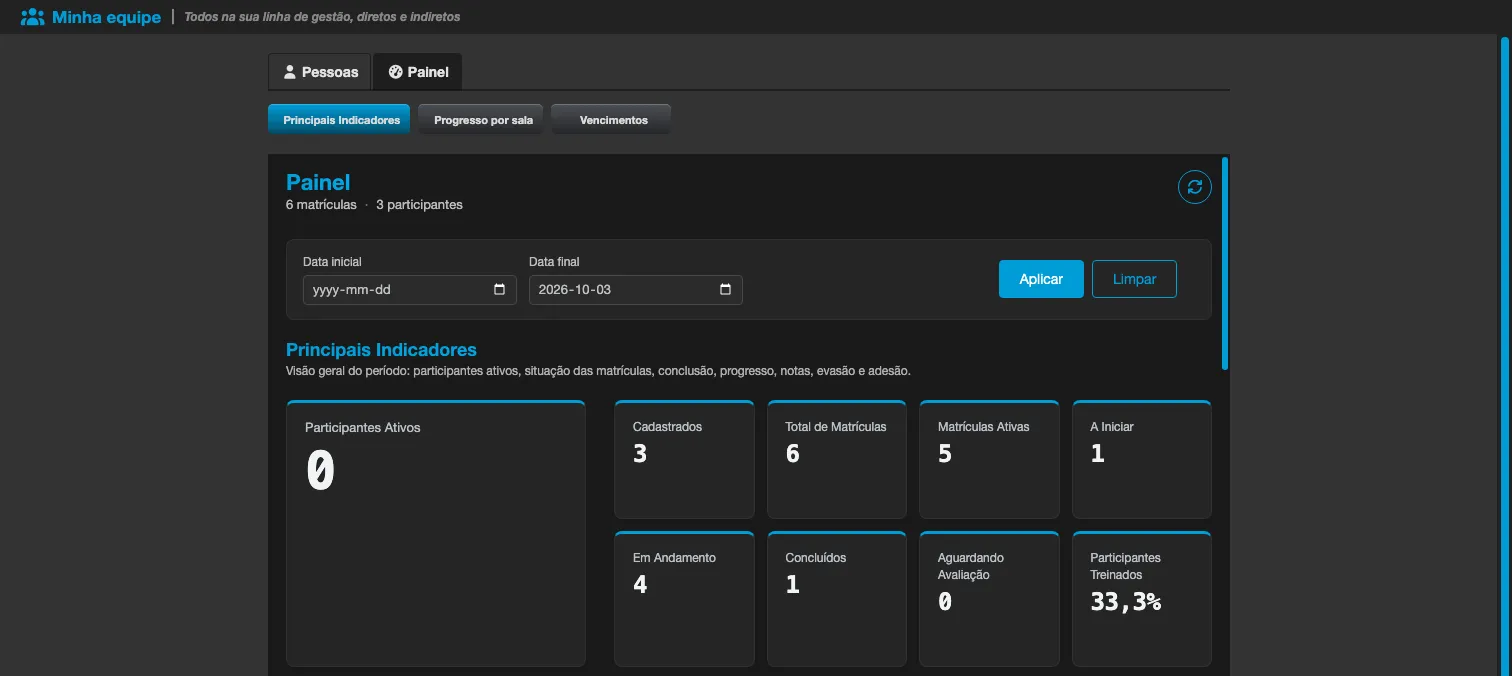
Section titled “Dashboard tab”The Dashboard tab shows a dashboard with metrics for your direct reports.
Requests tab
Section titled “Requests tab”When the institution uses enrollment management, the screen gets a Requests tab, where you approve or deny the enrollment requests of the people who report directly to you. Someone who only acts as a substitute, or receives requests through escalation without having reports, sees only this tab.
Deciding requests
Section titled “Deciding requests”Requests appear grouped by class. For each class you see the First session, the Place, the Modality, the Workload, the Seats left, the Reserved seats left, the size of the Waiting list, the Cost per participant and, when filled in, the Cost type, the Cost multiplier and the Instructor hours. Each row has the person’s name, Requested on the date of the request, how many other open requests they have, and where the request comes from for you: As manager, As substitute or By escalation.
- Tick the people (or use Select all, or Approve all in this class).
- Click Approve N or Deny N, where N is the number of ticked rows. You can decide 1 to 200 requests at a time.
- To deny, first choose a Reason for denial: Not aligned with objectives, Schedule conflict, Team coverage or Other. Without a reason, the screen warns “Choose a reason before denying”. Approving needs no reason. The same reason applies to all ticked rows and is sent to the participant.
- Confirm the question (for example, “Approve 2 requests?”).
At the end, the Result of your decision panel shows one line per person: Seat granted, Added to the waiting list (approved, but the class was full), Denied, Request closed (the class deadline had already passed), Already decided by someone else, Request not found, You cannot decide this request or Not processed - try again. Click Dismiss to go back to the list.
A few rules:
- You only decide the requests of your active direct reports (and those of managers you substitute for). You never decide your own request.
- In a batch, when two people compete for the last seat, the order of handling does not necessarily follow the request date. If the order matters, approve one at a time.
- If the class requires a prerequisite the person has not completed yet, approving puts them on the waiting list, even with free seats; they only get the seat after completing the content.
- A request left undecided for some days also moves up to your manager’s manager, who sees it in their own tab with the origin By escalation. The institution sets the number of days, and 0 turns escalation off.
- Requests made before the class became managed, or by people with no active manager, are decided by the class administrators and do not appear here.
- An institution administrator who has no reports does not see this tab: they decide through the class administrators, in the Enrollment queue tab.
My substitute
Section titled “My substitute”At the top of the tab, the My substitute block (for people who have reports) lets someone else decide in your place: “During the period, a substitute can approve or deny your team’s requests in your place.” It is useful for vacations and absences.
- Under Add a substitute, choose a person in Choose a person. The list has your direct reports, your manager and your peers (people with the same manager as you), active people only.
- Fill in From and Until. The period covers whole days: it starts at 00:00 of the first day and ends at 23:59 of the last. The end must be in the future, and the period can last at most 366 days.
- Click Add substitute. The screen confirms “Substitute added”.
The list shows each substitute with From … until … and who added them (Added by you, Added by an administrator or Added by an integration). Revoke ends the substitute right away, after asking for confirmation. A period that starts in the future appears in the list, but only takes effect from the start date. An administrator can also name a substitute for you, from the person’s record: see Enrollment management.
Daily e-mail
Section titled “Daily e-mail”If requests are waiting for your decision, you, your substitute and your manager’s manager (through escalation) receive at most one e-mail per day, from 8:00 in the institution’s time zone, with the subject Enrollments waiting for your approval. It lists the requests and has the Open in Eduvem button. People who turned off e-mail communications do not receive it.
Privacy
Section titled “Privacy”Because this screen exposes your team’s personal data, every access - opening the list, opening a person, exporting the CSV or opening the dashboard - is logged to the institution’s access log, to comply with Brazil’s LGPD.