


Multilingual content
With multilingual content, you author a single piece of content in more than one language and each participant sees it automatically in their own language. Instead of duplicating the same content in Portuguese, English and French (and having to keep three copies in sync), you keep one content item with translations per field.
The gain: an international team receives the same training, each person in their own language, without you having to manage parallel versions.
Before you begin: the two levels
Section titled “Before you begin: the two levels”There are two configuration levels, one for the institution and one for each piece of content:
- Institution languages. First, your institution needs to have more than one language enabled. The first language in the list is the base language - everything falls back to it when there is no visible translation (see the next section). This is enabled by the Eduvem team, so if you want to offer, for example, Portuguese and French, ask Eduvem support to enable French for your institution.
- Multilingual content, per content item. With more than one language enabled, you decide, content item by content item, whether it is multilingual. Open the content, go to the Configuration tab and turn on the “Multilingual content?” switch. Once turned on, a block of fields appears for each additional institution language (Title, Description and the “Visible to learners” switch).
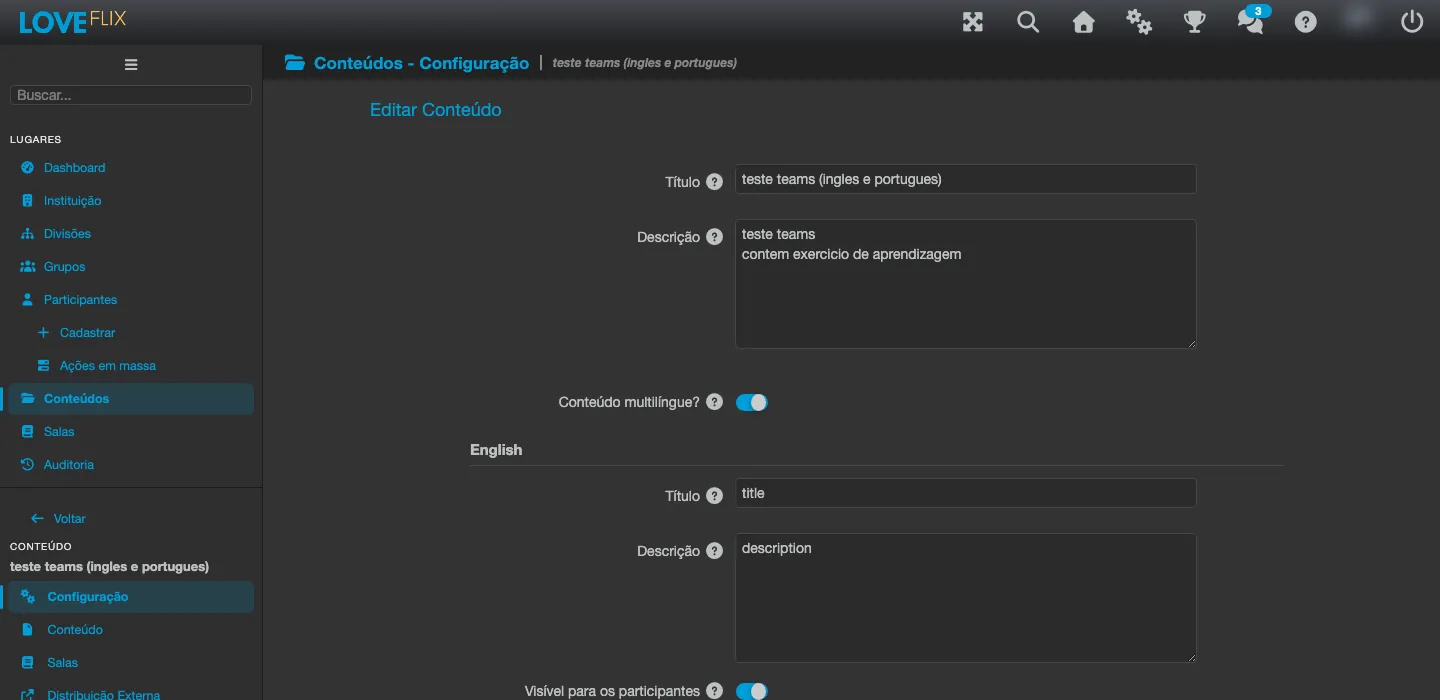
By default the feature comes turned off: an institution with a single language keeps working exactly as before, with no change at all. And you do not need to translate everything at once - translate what makes sense first and leave the rest in the base language for now.
How the participant sees the right language
Section titled “How the participant sees the right language”Eduvem chooses the language the participant sees by combining three things:
- the language the participant themselves chose on the platform;
- the languages enabled at the institution;
- the languages marked as visible on that content (the “Visible to learners” switch from the previous section).
If there is a translation for the participant’s language and it is marked as visible, they see it. If there is not, the content falls back to the base language - it never stays blank and never shows an unexpected third language. This “falls back to base” behavior applies to everything: lecture text, exam, images, certificate, the detail screen’s sections and tips, and library files.
Where to translate each thing
Section titled “Where to translate each thing”After turning on “Multilingual content?” on the Configuration tab (previous step), each of the areas below gets a version per language. Here is where to find each one.
Content title and description
Section titled “Content title and description”They stay on the Configuration tab itself, right below the “Multilingual content?” switch - one block per language, each with Title, Description and the visibility switch (image above).
Lecture text and the final exam
Section titled “Lecture text and the final exam”Open the Content tab (the Wizard’s lecture editor). In the top-left corner, a selector shows the language you are editing - by default, “pt_BR (Base language)”.
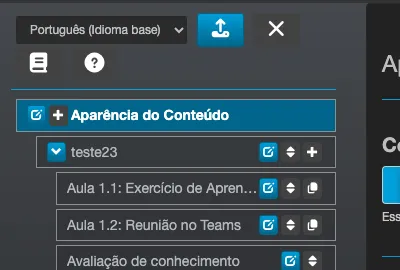
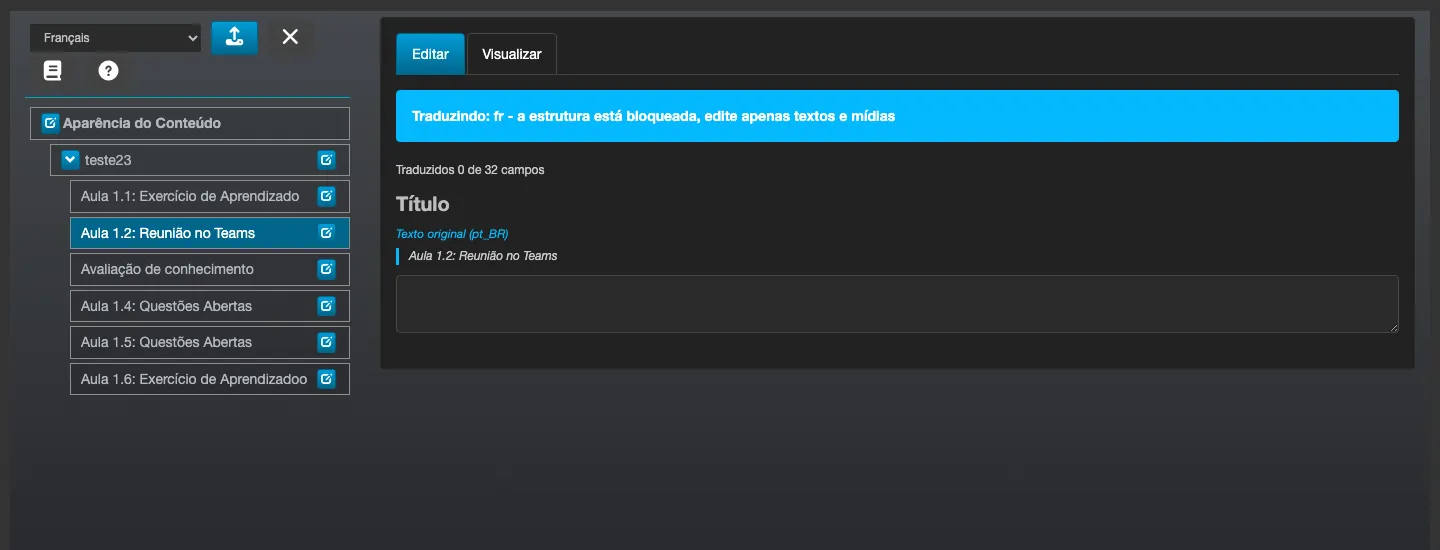
Switch to another language in the selector to translate that lecture (the text and the media) and the final exam and its questions (the prompt and the choices). When you enter translation mode, a warning appears: “the structure is locked, edit only text and media” - you do not add, remove or reorder lectures while editing a translation; that is only done in the base language. A counter (“X of Y fields translated”) shows how many fields of that lecture already have a translation.
Every translatable field shows the “Original text (pt_BR)” right above the blank field where you type the translation - you always see what needs translating, without having to switch between tabs to check the base text.
SCORM package (one file per language)
Section titled “SCORM package (one file per language)”Everything above applies to content created in the Wizard, where you translate field by field. Content of the SCORM type works differently: the material already comes ready inside a .zip package, so translation is not done within Eduvem - you upload one package per language.
On the content’s Content tab, besides the upload for the base package, an upload field appears for each language marked as visible on that content. A few important points:
- The base package comes first. Uploading a translation before a base package exists is refused.
- Only the languages visible on that content appear - not every language at the institution.
- With no package in the participant’s language, they receive the base package. Nothing is ever left without content.
- The participant’s language is set on first access and does not change afterward. Each language is a separate package, with its own progress; switching someone’s package partway through would lose that progress. So even if you later change the content’s visible languages, anyone who has already entered stays on the package they started in.
Thumbnail, cover and Landing Page image
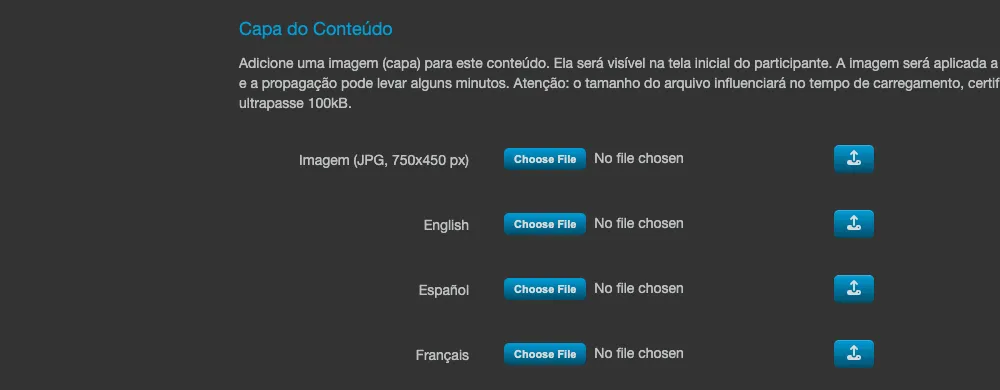
Section titled “Thumbnail, cover and Landing Page image”On the content’s Details tab, the “Content Cover” and “Landing Page Image” sections gain an extra upload row per language (identified by the language suffix, for example “- fr”). Upload an image specific to a language only when it makes sense (for example, a cover with translated text); if you upload nothing, that language uses the base language’s image.
Certificate
Section titled “Certificate”The certificate title follows the same translation from the Configuration tab (it is the content’s title). The certificate background image, in the “Certificate Background” section of the Details tab, also accepts a version per language - the per-language upload rows appear once the content’s certificate configuration has been saved for the first time, whatever the model (Default or Advanced). A language with no image of its own uses the base language’s image.
Detail screen sections and tips
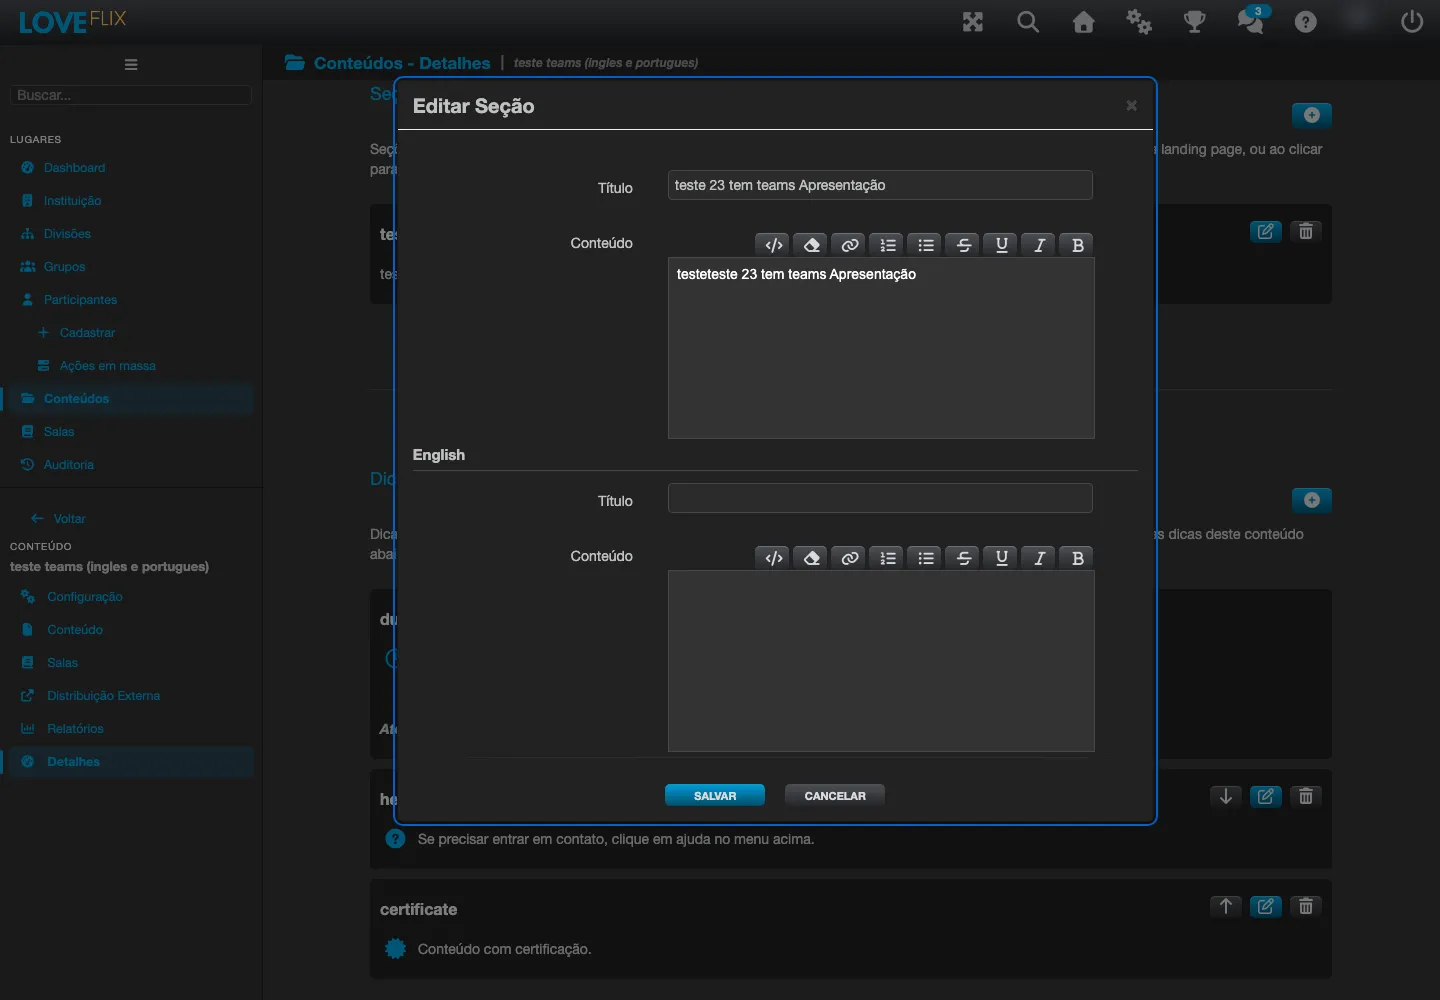
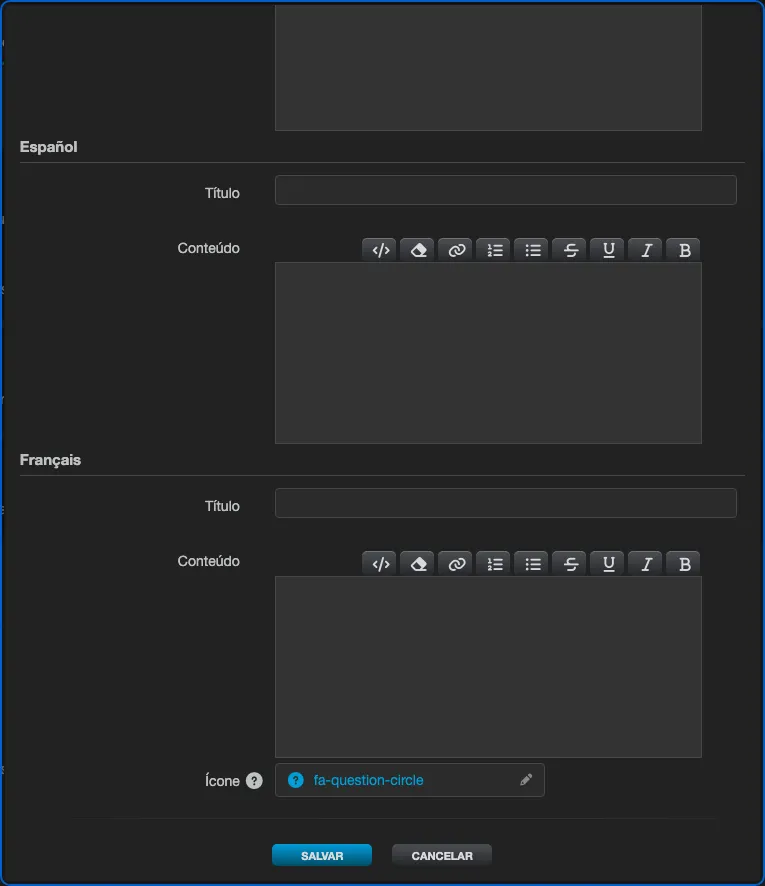
Section titled “Detail screen sections and tips”Still on the Details tab, the “Detail Screen Sections” and “Detail Screen Tips” sections show a list of items already created. Click an item’s pencil icon to open the edit form - it brings Title and Content (text) in one block per language, the same pattern as the other areas. On the tip’s form, the Icon field (a single one shared by every language) opens a visual icon picker - click the pencil next to the current icon to choose another.
Library
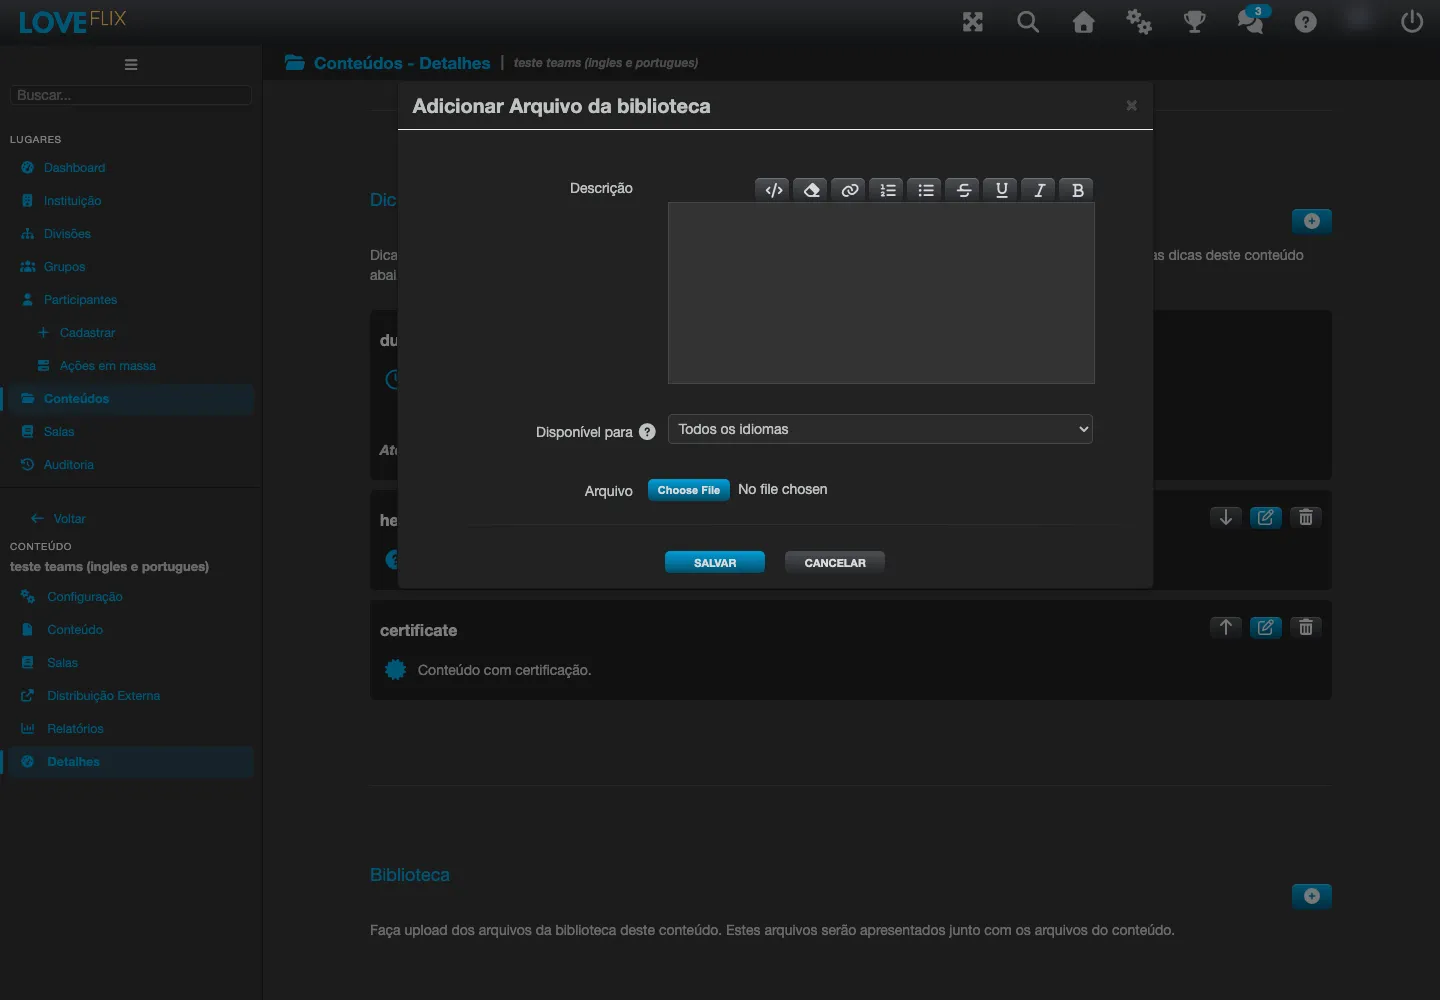
Section titled “Library”On the “Library” section of the Details tab, click the + button to add a file. The form has an “Available for” field, with the options “All languages” or a specific language (Português, Français, Español, English). To offer, for example, the same manual in Portuguese and French, upload two files - one with “Available for: Português” and another with “Available for: Français”. Each participant only sees files marked for “All languages” plus the ones in their own language.
Category groups and categories
Section titled “Category groups and categories”Categories and category groups (configured under Institution > Home Screen) also have a name per language. Click the pencil icon of a category (or a category group) to open the “Edit Category” form - it brings the Category Name in Portuguese and an equivalent field for each additional institution language.
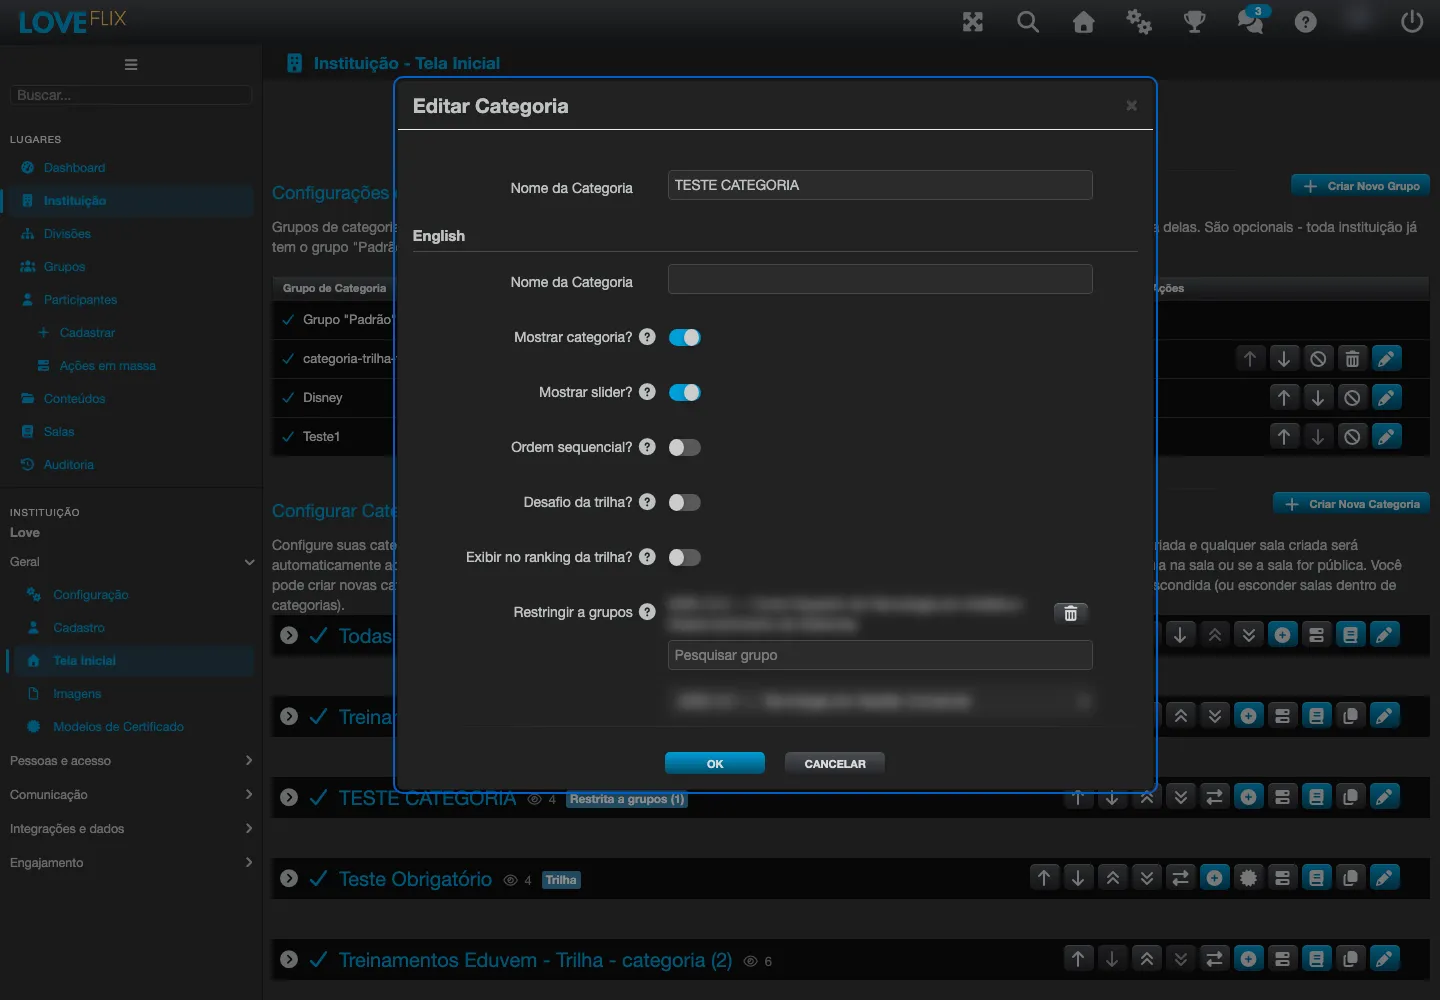
Unlike the other areas, categories and groups have no per-language visibility switch - they go straight by the rule from the “How the participant sees the right language” section: if there is a name translated into the participant’s language, it appears; if not, it falls back to the base name.
On the “Edit Category Group” form, besides the name, the Group Cover and the Group Banner also accept an image per language - an extra upload row for each additional language, identified by the language suffix (for example “Group Cover - es”), in the same format described in “Thumbnail, cover and Landing Page image”. If you do not upload an image for a language, it uses the base language’s image.
Home Screen: background, banner and news pop-up
Section titled “Home Screen: background, banner and news pop-up”Still under Institution > Home Screen, when the institution has more than one language enabled, these fields also get a version per language:
- Background and Banner of the home screen (Flix layout) - one upload row per language.
- News Pop-up - all five fields: Title, News text, Landscape image, Portrait image and Link. The text fields and the link appear grouped by language; the two images each get an upload row per language.
The pop-up fields only appear while the “Show News Pop-up” switch is on. As with everything else on this page, a language with no translation of its own falls back to the base value - including for the images and the link, which lets you, for example, translate only the title and reuse the same artwork for every language.
The visibility lock
Section titled “The visibility lock”Marking a language as Visible to learners (on the content’s Configuration tab) is what releases that translation to the public. While the language is not visible:
- the translation can exist and be edited by you in any of the areas above;
- but the participant in that language keeps seeing the base language.
Use this to prepare a translation calmly, without showing it half-finished.
In the Library, the lock works a little differently: instead of “visible or not”, each file is assigned to one specific language (or to “All languages”) through the “Available for” field - there is no “hidden” version of a library file, it simply does not appear to anyone on a different language.
Important: editing and saving does not erase translations
Section titled “Important: editing and saving does not erase translations”Editing the content in the base language (changing the title, saving) preserves the translations already saved. You can adjust the base text as much as you like and the versions in other languages stay intact. (If, on reopening, a translated field appears empty after a save, notify support - the expected behavior is for the translation to survive the edit.)
Distributing or duplicating
Section titled “Distributing or duplicating”When you duplicate a piece of content, or distribute it to another institution that also has the language enabled, the translations (title, description, lectures, exam, images, certificate, sections, tips and library files) go along with it - you do not need to retranslate the copy.