


Transferring enrollments between classes
When a participant needs to change classes (a change of term, a reorganized class, an enrollment made in the wrong place), the transfer moves the whole enrollment - without cancelling and redoing it.
What the transfer preserves
Section titled “What the transfer preserves”- Progress follows the participant: the percentage and the advancement in the content carry over to the destination class - nobody starts from scratch because of an administrative change.
- The history is recorded: the institution’s audit log records who was transferred, from which class, to which class, and when - if a participant “appears in two classes” in the history, that is why.
How to transfer
Section titled “How to transfer”- In the current class, open the list of enrollments and find the participant.
- In the row’s actions column, click Manage enrollment (the gear icon) - it opens the management modal for that enrollment.
- In the Transfer section, choose the destination class from the list and confirm with Transfer.
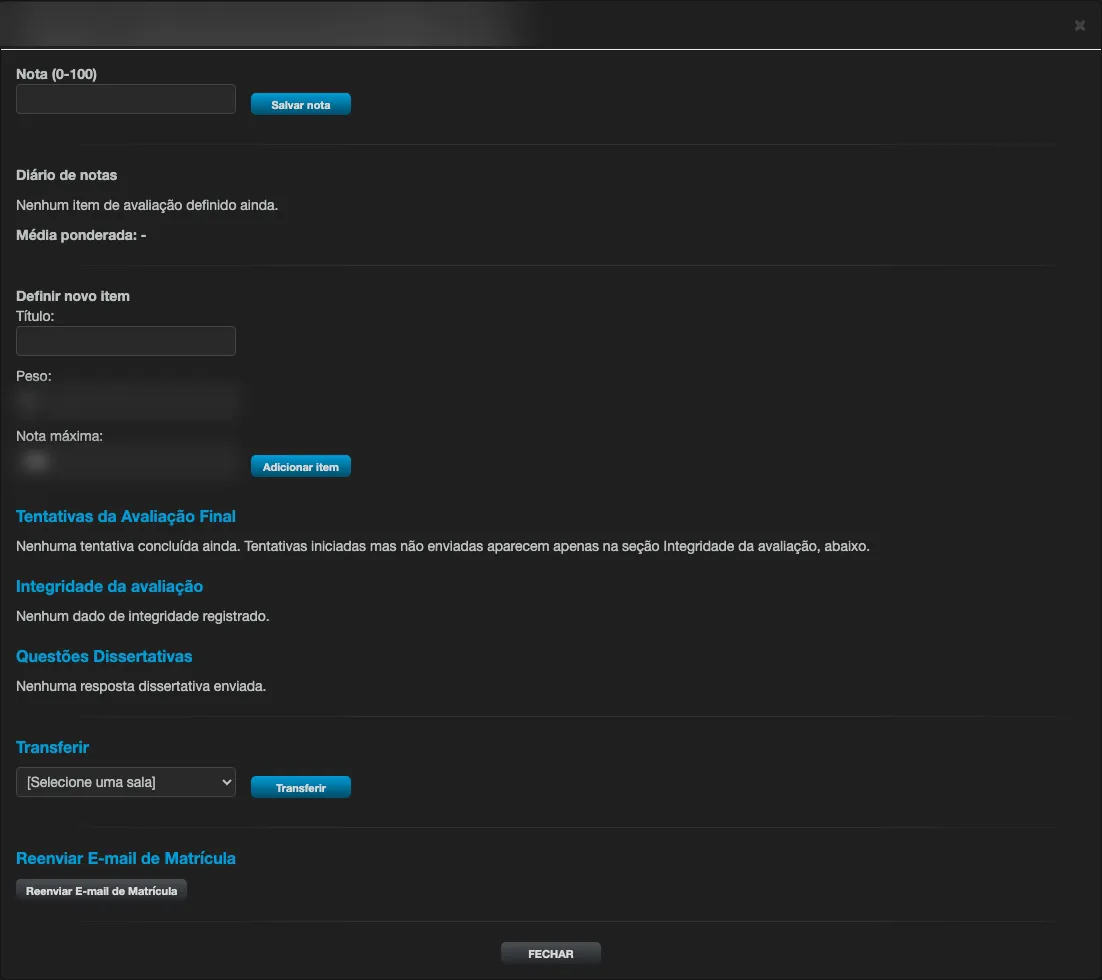
The same modal gathers the other enrollment actions - restarting the final evaluation or the whole enrollment, entering a score manually, checking the evaluation attempts, and resending the enrollment email.
Before transferring
Section titled “Before transferring”- Transfers are only possible between classes of the same content: the destination list shows only other classes of that same content administered by you - it is not possible to transfer to a class of a different content from this screen. If there is no other class of the same content, the transfer option does not even appear in the modal.
- Make sure there is a seat in the destination class - classes with a participant limit should not receive transfers beyond capacity; free up a seat first if needed.
- Deadlines and rules become those of the destination class - check its access deadline before moving someone close to their expiration.