


Managing classes
The class is where a piece of content meets its participants: each class belongs to one piece of content and brings together that group’s enrollments, deadlines, and tracking.
Creating a class
Section titled “Creating a class”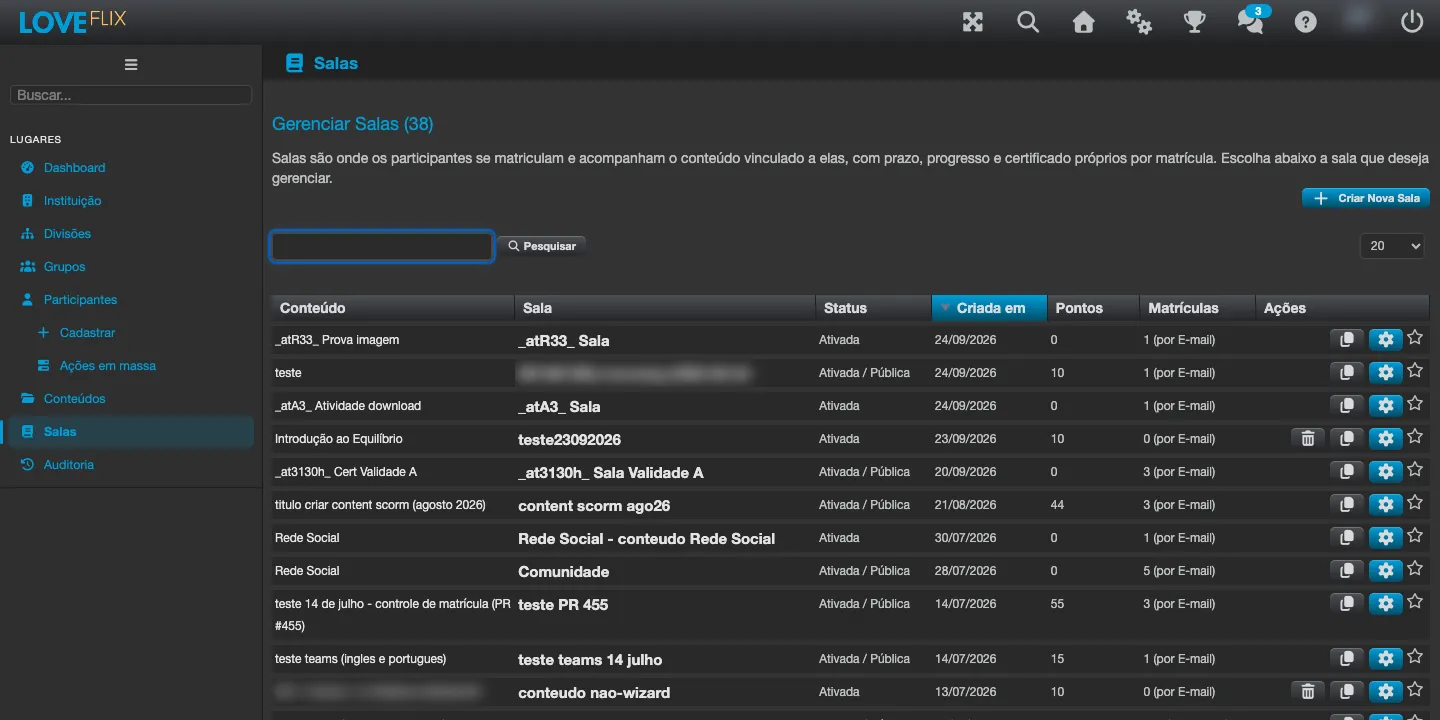
- In Classes, in the administrative console’s side menu, click Create New Class and choose the desired content.
- Give it a name that identifies the audience (for example, the period or the area served).
- Set the class’s configuration: access period, approval criteria, and enabled features (like the class chat).
Enrolling participants
Section titled “Enrolling participants”- Enroll people individually from the class itself, searching by name or email.
- For large audiences, use bulk operations or groups to enroll several participants at once.
- Depending on the institution’s configuration, a class can also be made available in the storefront for the participant to self-enroll.
For enrollment states, transfers, and deadlines, see the Enrollments section.
Tracking progress
Section titled “Tracking progress”Through the class, the administrator tracks each participant’s situation: progress in the content, evaluation scores, and completions. For a consolidated view or data export, use the reports.
Communicating with the class
Section titled “Communicating with the class”- Send messages to every participant of the class straight from the platform.
- Enable the class chat when you want a discussion channel between participants and tutors.